TIPM fuel pump relay bypass kits provide a reliable solution for faulty relays, ensuring consistent fuel pump operation and enhancing overall vehicle performance and driver peace of mind.
1.1 Overview of the TIPM System and Its Role in Fuel Pump Operation
The Totally Integrated Power Module (TIPM) is a central electrical control unit, often located under the hood, acting as a modern fuse box. It manages power distribution for various vehicle systems, including the fuel pump. The TIPM contains a fuel pump relay that switches power to the pump, enabling fuel delivery to the engine. Understanding its role is crucial for diagnosing and resolving fuel pump operation issues effectively.
1.2 Understanding the Need for a Fuel Pump Relay Bypass
The TIPM fuel pump relay is crucial for controlling power to the fuel pump, but its failure can lead to no-start conditions. Since the TIPM is a non-serviceable unit, bypassing the faulty relay with an external kit ensures reliable fuel pump operation. This solution avoids the high cost of replacing the entire TIPM module and provides a more accessible fix for drivers experiencing intermittent or permanent fuel pump issues.
Importance of Bypassing the Fuel Pump Relay
Bypassing the fuel pump relay ensures reliable fuel delivery, preventing no-start conditions and costly repairs. It avoids TIPM module replacement, offering a cost-effective solution for continued vehicle operation and peace of mind.
2.1 Common Failure Modes of the TIPM Fuel Pump Relay
The TIPM fuel pump relay often fails due to faulty diodes, worn contacts, or solder joints. These issues can prevent the fuel pump from activating, leading to no-start conditions. Over time, electrical stress may cause the relay to malfunction, requiring bypassing to maintain reliable fuel delivery and avoid unexpected breakdowns. Understanding these failure modes is crucial for proactive maintenance and troubleshooting.
2.2 Consequences of a Failed Fuel Pump Relay
A failed TIPM fuel pump relay can prevent the fuel pump from operating, resulting in a no-start condition. This can strand drivers unexpectedly and require costly towing. Additionally, intermittent relay failures may cause stalls while driving, posing safety risks. Without proper fuel flow, the engine cannot run, emphasizing the need for a reliable bypass solution to maintain consistent vehicle operation and avoid further complications or damage. Immediate attention is essential to prevent such issues.
2.3 Benefits of Installing a Bypass Kit
Installing a TIPM fuel pump relay bypass kit offers a permanent solution to faulty relays, ensuring reliable fuel pump operation. It eliminates intermittent starting issues and reduces the risk of sudden engine stalls, enhancing safety. The bypass kit provides consistent power delivery to the fuel pump, preventing no-start conditions and prolonging vehicle reliability. This cost-effective solution avoids the need for repeated TIPM replacements, offering long-term peace of mind for vehicle owners. It is a practical and durable fix.
Components of a TIPM Fuel Pump Relay Bypass Kit
A typical bypass kit includes a high-quality external relay, wiring harness, inline fuse, heat-shrink tubing, and connectors, ensuring reliable fuel pump operation and long-term durability.
3.1 Key Parts Included in the Bypass Kit
A typical TIPM fuel pump relay bypass kit includes an external relay, wiring harness, inline fuse, heat-shrink tubing, and connectors. These components ensure reliable power delivery to the fuel pump, bypassing the faulty TIPM relay. The external relay is usually heavy-duty to handle continuous operation, while the wiring harness is designed for durability and resistance to heat and moisture. Connectors are often weather-sealed to prevent corrosion.
3.2 Recommended Tools for the Installation Process
Essential tools include a screwdriver set, pliers, wire strippers, and a soldering iron for connections. A wiring diagram and multimeter are crucial for diagnosing issues. Safety gear like gloves and goggles is recommended. A test light helps verify wiring, while a voltage meter ensures proper electrical flow. These tools enable a secure and efficient installation of the bypass kit, minimizing risks and ensuring reliability.
3.3 Importance of Using Genuine or Compatible Parts
Using genuine or compatible parts ensures optimal performance and reliability. Non-compatible components may lead to electrical issues or system malfunctions. Genuine parts are designed to meet specific vehicle standards, reducing the risk of failure. They also maintain electrical integrity and prevent potential damage to the TIPM or fuel pump. Always verify part numbers and sources to guarantee compatibility and durability for your bypass kit installation.
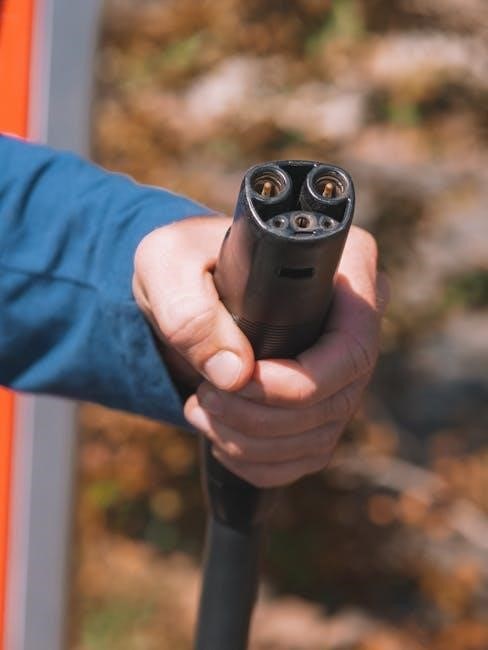
Locating the TIPM and Fuel Pump Relay
The TIPM module is typically located under the hood, serving as the vehicle’s fuse box. The fuel pump relay is an internal component within the TIPM.
4.1 Where to Find the TIPM Module in Your Vehicle
The TIPM module is generally located under the hood, near the driver’s side fender or fuse box area. It resembles a large, rectangular fuse box with various electrical connections. To access it, you may need to remove protective covers or panels. Always refer to your vehicle’s manual for specific location details, as positions can vary by make and model.
4.2 Identifying the Fuel Pump Relay Within the TIPM
The fuel pump relay is an internal component of the TIPM module, located on the circuit board beneath the fuse box. It is not externally serviceable and requires disassembly to access. The relay is typically identified by its connection to the fuel pump circuit and may be labeled or color-coded in the wiring diagram. Consult a professional or detailed wiring schematic for precise identification and safe handling.
4.3 Understanding the Wiring Diagram for the Fuel Pump Circuit
The wiring diagram for the fuel pump circuit outlines connections between the TIPM, fuel pump, and other components; It typically shows the relay’s location, power sources, and ground connections. Color-coded wires indicate specific functions, such as the brown wire for the fuel pump circuit. Consulting the diagram ensures proper identification of wires and connections, crucial for safe and accurate bypass installation. Always refer to the diagram to avoid electrical errors.
Pre-Installation Checks and Precautions
Verify fuel pressure, ensure proper electrical connections, and check for ground issues. Disconnect the battery and follow safety protocols to avoid electrical damage or fire hazards during installation.
5.1 Checking Fuel Pressure Before Starting the Bypass
Checking fuel pressure before bypass installation ensures proper system operation. Use an inline pressure gauge to measure pressure, typically between 35-45 PSI for most vehicles. This step verifies the fuel pump’s functionality and identifies potential issues before modifying the circuit. Ensure the system is not over-pressurized, as this could damage components. Proper pressure levels are essential for safe and effective bypass installation.
5.2 Ensuring Proper Electrical Connections and Grounds
Proper electrical connections and grounds are crucial for a safe and effective bypass. Inspect all wiring for damage or corrosion, ensuring all terminals are clean and securely connected. Verify that ground wires are properly attached to the vehicle’s chassis or grounding points. Loose connections can cause electrical failures, while poor grounding may lead to system malfunctions. Always follow the manufacturer’s guidelines for wiring and grounding to maintain reliability and prevent damage.
5.3 Safety Measures to Avoid Electrical Damage or Fire
Disconnect the battery before starting to prevent short circuits. Use insulated tools to avoid sparks, and ensure all connections are secure to prevent arcing. Avoid damaged wires or connectors, as they may cause electrical fires. Keep flammable materials away from the work area. Use a relay rated for your vehicle’s voltage to prevent overheating. Properly ground components to avoid power surges and ensure safe operation.
Step-by-Step Instructions for Installing the Bypass Kit
Disconnect the battery, access the TIPM module, locate the fuel pump relay, wire an external relay, connect it to the fuel pump, and test the circuit functionality.
6.1 Disconnecting the Battery and Preparing the Vehicle
Always start by disconnecting the negative battery terminal to prevent electrical shocks or damage. Ensure the vehicle is in park with the brake engaged. Locate the battery, typically under the hood or in the trunk, and use an appropriate wrench to loosen the terminal clamp. Remove the negative cable and wait a few minutes for any stored energy in the system to discharge. This step ensures safety and prevents accidental fuel pump activation during the bypass installation. Gather all tools and materials beforehand to streamline the process.
6.2 Accessing the TIPM Module and Fuel Pump Relay
The TIPM module is typically located under the hood, consolidated with the fuse box. To access it, remove the cover and any protective shielding. The fuel pump relay is embedded within the TIPM and is not directly serviceable. You’ll need to identify the specific wires connected to the relay using a wiring diagram. Carefully disconnect any connectors to avoid damaging the module or surrounding components. If unsure, consult a professional or detailed schematic for guidance.
6.3 Wiring the External Relay and Connecting It to the Fuel Pump
Connect the external relay to the fuel pump by wiring the positive and negative terminals. Use the brown wire (connector C1 pin) linked to the PCM and the red wire for 12V power. Ensure all connections are secure to prevent electrical issues. Properly ground the relay to maintain safe operation. Double-check wiring with a diagram to avoid errors. Test the circuit to confirm the fuel pump operates correctly before finalizing the installation.
6.4 Testing the Bypass Circuit for Proper Functionality
After wiring the external relay, test the bypass circuit by turning the ignition key to the “ON” position without starting the engine. Use a test light to verify power flows through the relay to the fuel pump. Listen for the pump activating and check fuel pressure with a gauge. Ensure the pump operates consistently and shuts off when the ignition is turned off. Proper functionality confirms the bypass is working as intended, providing reliable fuel delivery.
Verifying the Success of the Bypass
Verify the bypass by checking fuel pressure, ensuring the vehicle starts, and monitoring proper fuel pump operation. A successful bypass ensures consistent fuel flow and reliable engine performance.
7.1 How to Test the Fuel Pump Operation After Bypass
To test the fuel pump operation after bypass, start the engine and monitor for consistent running. Use an inline pressure gauge to verify fuel pressure matches specifications. Listen for unusual noises and check for leaks in the fuel system. Ensure the pump activates when the ignition is on and deactivates when the engine is off. Proper operation confirms the bypass is functioning correctly.
7.2 Checking for Proper Fuel Pressure and Flow
After bypass installation, connect an inline fuel pressure gauge to monitor system pressure. Ensure readings align with manufacturer specifications, typically between 35-45 PSI for most vehicles. Listen for any unusual noises indicating poor flow. If pressure is low, check for blockages or faulty connections. Proper flow ensures efficient engine performance and prevents damage to fuel system components. Consult your vehicle’s repair manual for exact pressure specifications.
7.3 Ensuring the Vehicle Starts and Runs Normally
After completing the bypass, start the engine and monitor its operation. Check for rough idling, stalling, or lack of power. Ensure the fuel pump engages smoothly and consistently. Verify fuel pressure using a gauge, aiming for the manufacturer-recommended range (typically 35-45 PSI). If issues persist, inspect all connections and wiring for integrity. Proper functionality ensures reliable starting and steady engine performance under various driving conditions.
Troubleshooting Common Issues After Bypass
Diagnose no-start conditions, wiring faults, and fuel pump malfunctions post-bypass. Check connections, ensure proper relay operation, and verify fuel pressure to resolve issues effectively and safely.
8.1 Diagnosing No-Start Conditions Post-Bypass
If your vehicle fails to start after bypassing the fuel pump relay, check for short circuits, improper wiring, or faulty connections. Ensure the external relay is functioning correctly and that fuel pressure is within the specified range. Verify the ignition circuit is providing power to the relay and that the fuel pump is receiving the correct signal. Consult wiring diagrams if necessary and test the bypass circuit for any signs of damage or malfunction. Addressing these issues promptly will help restore proper fuel pump operation and eliminate no-start conditions effectively.
8.2 Identifying and Fixing Wiring or Connection Problems
Inspect all wiring and connections for damage, corrosion, or loose terminals. Verify the bypass relay is properly wired to the fuel pump and ignition circuit. Check for short circuits or incorrect wire routing. Ensure the brown wire from the PCM is correctly connected to the relay. Test continuity and voltage drop across connections. Replace any damaged wires or faulty connectors to restore proper electrical flow and ensure the bypass functions correctly.
8.3 Addressing Fuel Pump or Relay Malfunctions
If the fuel pump fails to activate after bypassing, inspect the fuel pump itself for damage or wear. Use a test light to verify power delivery to the pump. Replace the fuel pump if it shows no signs of operation. Ensure the external relay is functioning correctly and wired properly. If issues persist, consider replacing the fuel pump or relay with genuine components to restore reliable operation and prevent further complications down the road.
Temporary vs. Permanent Bypass Solutions
A temporary bypass provides a quick fix for fuel pump relay issues, while a permanent solution involves installing an external relay for long-term reliability and safety.
9.1 When to Use a Temporary Bypass
A temporary bypass is ideal in emergency situations, such as when stranded, to quickly restore fuel pump function and mobility. It provides an immediate fix, allowing the vehicle to operate until a permanent solution can be implemented. This approach is beneficial for those seeking a quick, less invasive solution, though it may pose risks like continuous pump operation or electrical issues. It serves as a bridge to a more reliable, long-term repair.
9.2 Benefits and Drawbacks of a Permanent Bypass
A permanent bypass eliminates the faulty TIPM relay, ensuring consistent fuel pump operation and long-term reliability. It removes the risk of relay failure, offering peace of mind. However, improper installation can lead to electrical issues, and the bypass may keep the pump running continuously, draining the battery or causing wear. Professional installation is recommended to avoid such risks and ensure proper functionality.
9.3 Recommendations for Long-Term Reliability
For long-term reliability, use high-quality, genuine components and follow precise installation steps. Ensure all electrical connections are secure and protected from moisture. Regularly inspect the bypass circuit for wear or damage. Consider consulting a professional for complex setups to avoid potential issues. Proper maintenance and inspections will help ensure the bypass system functions reliably over time, preventing unexpected failures and maintaining your vehicle’s performance.
Safety and Long-Term Considerations
Ensure proper installation to avoid electrical damage or fire. Use genuine parts for reliability. Regularly inspect the bypass circuit to maintain functionality and prevent long-term issues effectively.
10.1 Potential Risks of Improper Installation
Improper installation of the bypass kit can lead to electrical fires, fuel pump malfunctions, or short circuits. Incorrect wiring may cause irreversible damage to the TIPM module or other components. Additionally, poor connections can result in inconsistent fuel pressure, leading to engine misfires or failure to start. Always follow instructions carefully to mitigate these risks and ensure safe operation.
10.2 Maintaining the Bypass Circuit Over Time
Regular inspections of the bypass circuit are crucial to ensure reliability. Check all connections for corrosion or wear and verify that all wires are securely fastened. Over time, environmental factors like moisture or temperature changes can degrade components. Replace any worn parts promptly to prevent electrical issues. Proper maintenance ensures the bypass remains functional, safeguarding your vehicle’s performance and preventing unexpected failures.
10.3 Considering Professional Help for Complex Issues
While bypass kits are designed for DIY installation, complex issues may require professional assistance. If you encounter wiring problems or electrical malfunctions beyond your expertise, consult a certified technician. They have the tools and knowledge to diagnose and resolve intricate faults, ensuring the bypass is installed correctly and safely. Professional help can prevent further damage and guarantee long-term reliability of your vehicle’s fuel system.
TIPM fuel pump relay bypass kits offer a reliable solution for faulty relays, ensuring consistent fuel pump operation and enhancing overall vehicle performance and driver peace of mind.
11.1 Summary of the Bypass Process and Its Benefits
The TIPM fuel pump relay bypass process involves installing an external relay to ensure consistent fuel pump operation, bypassing the faulty internal relay. This solution prevents no-start conditions and maintains proper fuel pressure. Benefits include improved reliability, reduced risk of electrical damage, and peace of mind for vehicle owners. The bypass kit provides a permanent fix, addressing common TIPM failures and ensuring long-term vehicle performance.
11.2 Encouragement for DIY Enthusiasts and Vehicle Owners
DIY enthusiasts and vehicle owners can confidently tackle the TIPM fuel pump relay bypass with detailed instructions and basic tools. This cost-effective solution empowers individuals to resolve issues independently, enhancing their mechanical skills and saving money. By following step-by-step guides, drivers ensure reliability and safety, avoiding costly repairs. Embrace this project to gain hands-on experience and extend your vehicle’s lifespan.