Instant Pot Duo Crisp Ultimate Lid Manual: A Comprehensive Guide
Welcome! This manual provides detailed guidance for your Instant Pot Duo Crisp Ultimate Lid‚ ensuring efficient and safe operation․ It’s designed to help you master pressure cooking‚ air frying‚ and more‚ unlocking a world of culinary possibilities․
Understanding the Instant Pot Duo Crisp Ultimate Lid
The Instant Pot Duo Crisp Ultimate Lid represents a significant advancement in multi-cooker technology‚ consolidating numerous functions into a single‚ convenient unit․ Unlike previous models requiring separate lids for pressure and air frying‚ this innovative lid seamlessly switches between both modes․ This eliminates storage concerns and simplifies the cooking process considerably․
Essentially‚ it’s two lids in one! The lid features a dial to select either pressure cooking or air frying․ When set to pressure cooking‚ it functions like a standard Instant Pot lid‚ building and maintaining pressure for fast‚ efficient cooking․ Switching to air frying activates the heating element and fan‚ transforming your Instant Pot into a versatile air fryer․
Understanding this dual functionality is key to maximizing the lid’s potential․ It’s designed to help you cook healthy‚ delicious meals more easily and in less time․ The Ultimate Lid is an efficient and convenient way to steam‚ pressure cook‚ slow cook and air fry‚ saving energy costs․
Key Features and Benefits of the Ultimate Lid
The Instant Pot Duo Crisp Ultimate Lid boasts several key features designed for enhanced cooking convenience and versatility․ Its primary benefit is the elimination of needing multiple lids – streamlining your kitchen and storage space․ The easy-switch dial allows for seamless transitions between pressure cooking and air frying‚ offering unparalleled flexibility․
Beyond convenience‚ the Ultimate Lid delivers consistent and reliable performance․ It ensures optimal pressure sealing for faster cooking times and even heat distribution during air frying for crispy‚ golden results․ The integrated controls are intuitive and user-friendly‚ making it accessible for cooks of all skill levels․
Furthermore‚ this lid promotes energy efficiency‚ potentially saving you money on energy costs․ It’s designed to help you cook healthy‚ delicious meals more easily․ Enjoy the benefits of a pressure cooker‚ slow cooker‚ and air fryer all in one appliance‚ simplifying meal preparation and expanding your culinary horizons․
Components of the Instant Pot Duo Crisp Ultimate Lid
The Instant Pot Duo Crisp Ultimate Lid comprises several essential components working in harmony․ The core element is the lid itself‚ featuring a robust‚ durable construction designed for both pressure and air frying functions․ A crucial part is the easy-switch dial‚ enabling seamless mode selection;

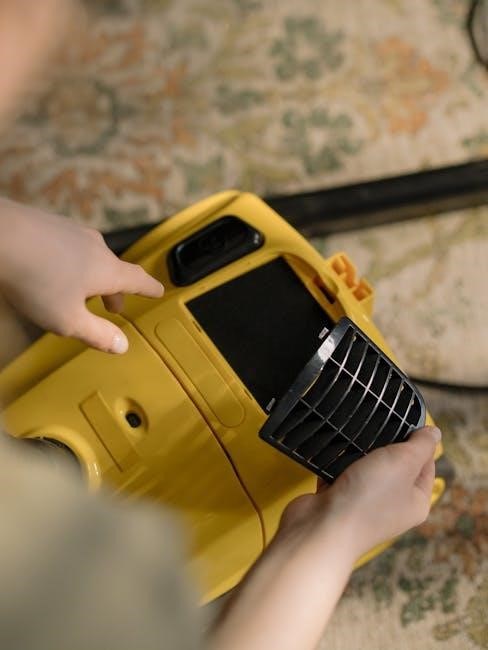
Internally‚ the lid houses a silicone sealing ring‚ vital for creating an airtight seal during pressure cooking․ The float valve‚ a small pin located within the lid‚ indicates pressure levels and ensures safe operation․ A steam release valve controls the release of pressure after cooking․
Additionally‚ the lid incorporates a protective shield around the steam release valve․ These components are designed for easy removal and cleaning‚ ensuring optimal hygiene and longevity․ Understanding each part’s function is key to safe and effective use․ Regular inspection and maintenance of these components will help maintain peak performance․
Lid Operation: Locking and Unlocking Mechanisms
Proper locking and unlocking of the Instant Pot Duo Crisp Ultimate Lid are paramount for safe operation․ To lock‚ align the lid with the base‚ ensuring the arrow on the lid matches the indicator on the pot․ Rotate the lid clockwise until it clicks securely into place․ This confirms a proper seal is formed․
Before attempting to unlock‚ ensure all internal pressure has been released – either through natural pressure release or quick release․ Gently rotate the lid counterclockwise․ If the lid remains stuck‚ avoid forcing it; a slight jiggle or tap may help release any residual pressure or condensation․
Never force the lid open while pressurized․ The locking mechanism prevents accidental opening during operation․ Familiarize yourself with the audible clicks indicating secure locking and unlocking․ Regular checks ensure the mechanism functions smoothly‚ preventing potential hazards and maintaining optimal performance․
Pressure Cooking with the Ultimate Lid: Step-by-Step
Step 1: Securely lock the Ultimate Lid onto the Instant Pot base․ Ensure the sealing ring is correctly positioned within the lid․ Step 2: Add ingredients to the inner pot‚ adhering to maximum fill lines․ Step 3: Select the “Pressure Cook” function and adjust the cooking time based on your recipe․
Step 4: Choose a pressure level – High or Low – as indicated in your recipe․ Step 5: Allow the Instant Pot to come to pressure․ This may take several minutes․ Step 6: Once cooking is complete‚ allow for natural pressure release (NPR) or perform a quick release (QR) following safety guidelines․
Remember to always unplug the Instant Pot before releasing pressure manually․ The Ultimate Lid’s design optimizes pressure distribution for efficient cooking․ Following these steps will help you achieve consistently delicious results․ Refer to your recipe for specific pressure levels and cooking times․
Air Frying with the Ultimate Lid: A Detailed Guide
Step 1: Switch the Ultimate Lid to air frying mode․ Ensure the inner pot is securely placed inside the Instant Pot base․ Step 2: Arrange food in a single layer within the inner pot or utilize the included air fryer basket for optimal circulation․ Avoid overcrowding for even cooking․
Step 3: Select the desired air frying temperature and time using the control panel․ Refer to your recipe for specific settings․ Step 4: Flip or toss food halfway through the cooking process to ensure consistent crisping․
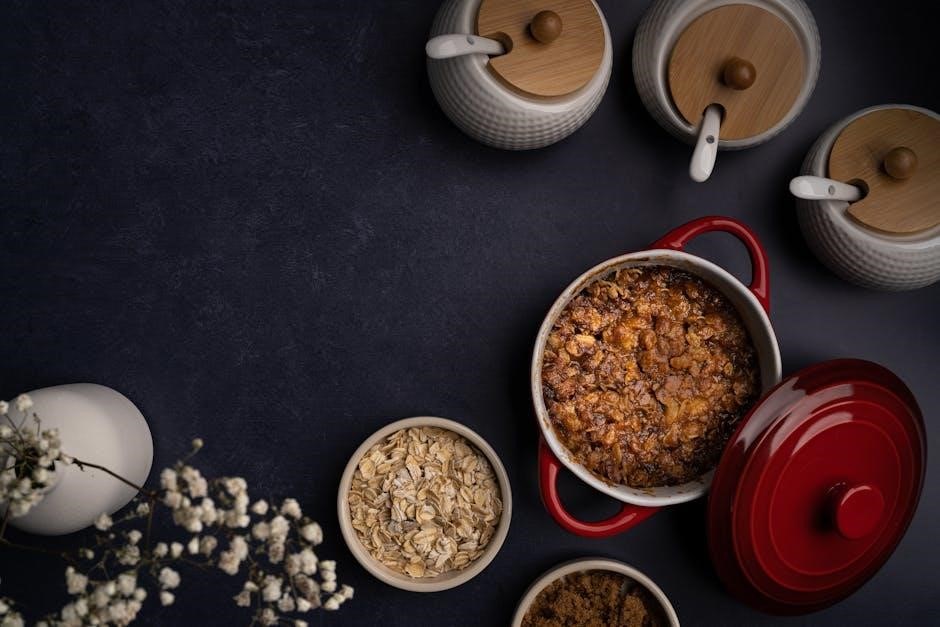
The Ultimate Lid delivers hot air circulation for crispy‚ golden results with less oil․ Regularly check food for doneness․ This feature is an efficient and convenient way to enjoy healthier fried favorites․ Remember to always use oven-safe accessories when air frying․ It’ll help you cook healthy‚ delicious meals․
Safety Features of the Ultimate Lid
The Ultimate Lid incorporates multiple safety mechanisms to ensure worry-free operation․ A key feature is the locking mechanism‚ preventing accidental opening during pressure cooking․ The float valve‚ crucial for pressure regulation‚ automatically rises to indicate pressurized conditions and prevents lid removal․
Overheat protection safeguards against excessive temperatures‚ while the lid’s design prevents steam from escaping improperly․ Always ensure the sealing ring is correctly positioned for a secure seal․ If the lid still won’t budge‚ gently jiggle or tap the lid handle․
Regularly inspect the steam release valve for blockages․ These features collectively contribute to a safe cooking experience․ Prioritize understanding these safeguards for optimal performance and peace of mind․ It’s designed to help you cook healthy‚ delicious meals more easily․
Float Valve: Function and Troubleshooting
The float valve is a critical safety component‚ indicating internal pressure․ During pressure cooking‚ it rises‚ sealing the lid and preventing opening․ If it remains down‚ pressure hasn’t built up; if it’s up‚ the pot is pressurized – never force the lid open․
Troubleshooting: If the valve is stuck‚ ensure no food particles obstruct it․ Gently push it down with a wooden spoon (when the pot is unplugged and cool) if it’s raised when it shouldn’t be․ Sometimes‚ food inside can lift it prematurely․

A common problem is the valve not sealing correctly‚ leading to pressure loss․ Ensure it’s properly seated․ If issues persist‚ consult the Instant Pot website for FAQs․ It’s supposed to be lifted by air/steam pressure‚ but it can also be lifted by the food inside․
Steam Release Methods: Quick vs․ Natural Release
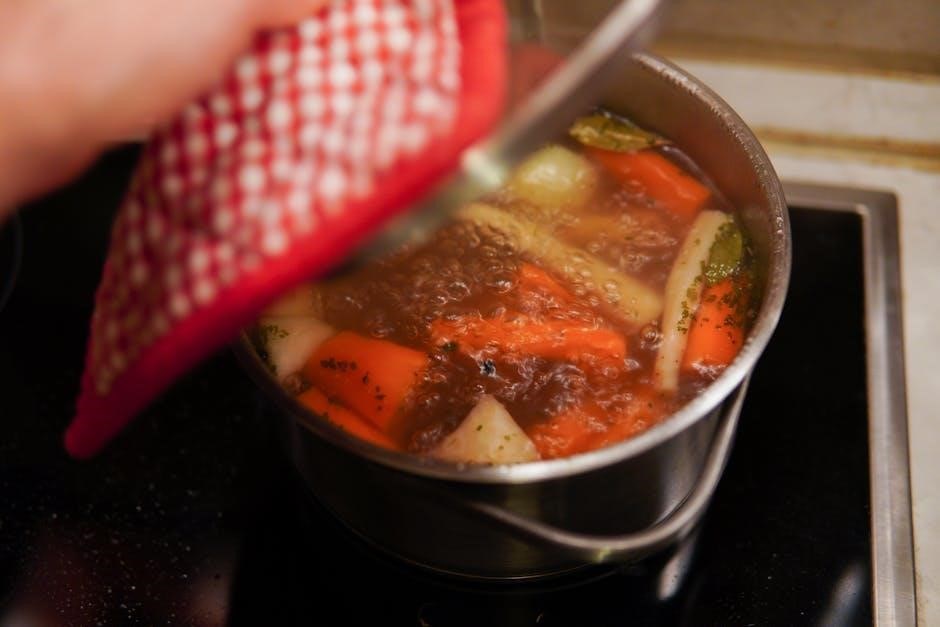
Understanding steam release is vital for safe and effective Instant Pot use․ There are two primary methods: Quick Release and Natural Release‚ each suited for different foods․ Quick Release involves carefully turning the steam release valve to vent steam rapidly․ This is ideal for vegetables or foods that continue cooking from residual heat․
Natural Release allows the pressure to dissipate gradually on its own․ This is best for soups‚ stews‚ and foods with high liquid content‚ preventing splattering and ensuring even cooking․ It takes longer‚ but yields tender results․
Caution: Always direct steam away from yourself and cabinets during Quick Release․ Never attempt to open the lid until all pressure has been released‚ indicated by the float valve dropping․ Choosing the correct method impacts texture and prevents overcooking․
Common Problems and Solutions: Lid Won’t Open
Encountering a lid that won’t open can be frustrating‚ but is often easily resolved․ First‚ ensure all pressure has been fully released․ Verify the float valve has dropped completely; if not‚ allow more time for natural pressure release․ Gently jiggling or tapping the lid handle can sometimes dislodge it if condensation creates a seal․

If the valve is down and the lid remains stuck‚ avoid forcing it․ Carefully inspect the sealing ring for debris or damage‚ ensuring it’s properly seated․ Unplug the Instant Pot before attempting any manual adjustments․ A slight movement of the lid while gently lifting can help break the seal․
Never attempt to open the lid while pressure remains․ This is a safety hazard․ If problems persist‚ consult the Instant Pot website or support resources for further assistance․
Common Problems and Solutions: Lid Won’t Lock
Difficulty locking the lid is a common issue‚ often stemming from improper alignment or pressure within the pot․ First‚ confirm the lid is correctly positioned‚ aligning the arrows as indicated in the manual․ Ensure the sealing ring is properly installed and not twisted or damaged – a misaligned ring prevents a secure lock․
Check for residual pressure․ Even a small amount of pressure can prevent locking․ Gently press down on the lid while attempting to rotate; this can help release any trapped air․ If the float valve is up‚ it indicates pressure‚ so allow for complete release before trying again․
Inspect the lid and pot rim for any debris or food particles obstructing the seal․ A clean surface is crucial for proper locking․ If issues persist‚ consult the Instant Pot support resources for further troubleshooting steps․
Addressing the “Burn” Message with the Ultimate Lid
The “Burn” message signals that food is sticking to the bottom of the inner pot‚ potentially scorching․ This often occurs with thicker sauces or foods high in sugar․ First‚ immediately release the pressure (quick release is recommended)․ Then‚ carefully open the lid‚ avoiding a forceful steam burst․

Next‚ add approximately one cup of liquid (water or broth) and use a wooden spoon to gently scrape the bottom of the pot‚ loosening any stuck-on food․ Ensure the food isn’t actually burned‚ just stuck․ Return the lid‚ seal‚ and pressure cook for another few minutes on a low-pressure setting․

Prevention is key․ Always ensure sufficient liquid is used‚ especially with recipes prone to sticking․ Deglaze the pot after sautéing before pressure cooking․ Consider using the pot-in-pot method for delicate dishes․ If the issue persists‚ review the recipe and adjust liquid levels accordingly․
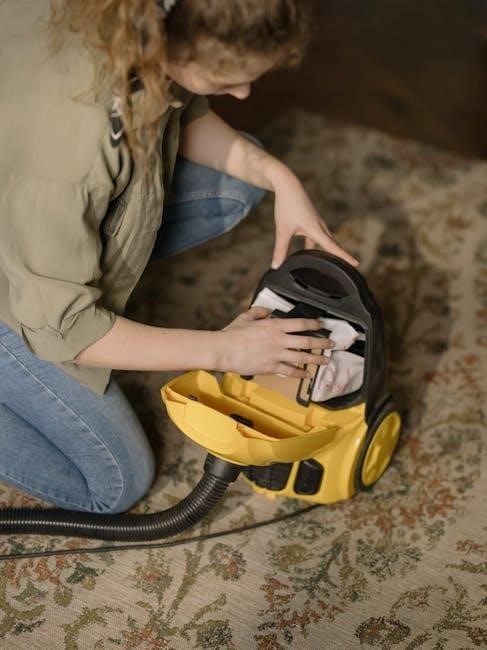
Cleaning and Maintenance of the Ultimate Lid
Regular cleaning is crucial for optimal performance and longevity of your Instant Pot Duo Crisp Ultimate Lid․ Always unplug the appliance and allow it to cool completely before cleaning․ The lid itself can be wiped down with a damp cloth – avoid harsh abrasives․
Crucially‚ the sealing ring requires frequent cleaning to prevent odor absorption․ Hand wash it with warm‚ soapy water after each use․ The steam release valve should also be removed and cleaned regularly to prevent blockages․ Inspect the float valve for debris and ensure it moves freely․
For deeper cleaning‚ occasionally disassemble removable parts and wash them thoroughly․ Refer to the dishwasher safety section to determine which components are dishwasher-safe․ Avoid immersing the main lid assembly in water․ Proper maintenance ensures your Instant Pot remains a reliable kitchen companion․
Cleaning the Sealing Ring and Steam Release Valve
Maintaining a clean sealing ring is paramount for preventing odor and flavor transfer between dishes․ After each use‚ remove the sealing ring and hand wash it with warm‚ soapy water․ A thorough rinse is essential to remove all soap residue․ For stubborn odors‚ soak the ring in a solution of one tablespoon baking soda to one cup of water․
The steam release valve also requires regular attention․ Remove it from the lid and check for any blockages․ Wash it with warm‚ soapy water‚ ensuring the interior is clear․ Pay close attention to the small vent holes‚ using a toothpick if necessary to dislodge any debris․
Properly cleaned components contribute to safe and efficient operation․ Allow both the sealing ring and steam release valve to dry completely before reassembling․ Regular cleaning extends their lifespan and ensures optimal performance with your Instant Pot Duo Crisp Ultimate Lid․
Dishwasher Safety: Which Parts Can Be Washed?
Convenience is key‚ and several components of your Instant Pot Duo Crisp Ultimate Lid are dishwasher safe! The inner pot‚ lid (without the electrical components!)‚ steam rack‚ and air fryer basket can all be safely washed on the top rack of your dishwasher․
However‚ caution is advised․ The sealing ring‚ while technically dishwasher safe‚ may absorb odors from other dishes and degrade faster․ Hand washing is recommended for longevity․ The steam release valve should also be hand washed to ensure thorough cleaning of the vent holes․
Avoid placing the lid itself in the dishwasher with the electrical components attached․ This can cause damage․ Always check the Instant Pot website or your manual for the most up-to-date dishwasher safety guidelines․ Following these recommendations will help maintain the integrity and performance of your appliance․
Troubleshooting: Food Stuck to the Bottom

Experiencing food sticking to the bottom of your Instant Pot? This is a common issue‚ often easily resolved․ Insufficient liquid is a primary cause; ensure you’re always using the minimum liquid amount specified in your recipe․ Deglazing the pot after sautéing is crucial – scrape up any browned bits before pressure cooking to prevent sticking․

Another factor can be the food itself․ Starchy foods like rice or oatmeal are more prone to sticking․ Consider using the pot-in-pot method – placing a heat-safe bowl inside the inner pot – for these recipes․ Ensure the float valve isn’t obstructed‚ as this can affect pressure and cooking evenness․
If food does stick‚ avoid forceful scraping‚ which can damage the coating․ Soak the pot with warm‚ soapy water for several hours before gently cleaning․ Remember‚ proper preparation and sufficient liquid are your best defenses against stuck-on food!
Troubleshooting: Float Valve Issues
A malfunctioning float valve is a frequent cause of Instant Pot problems․ If the valve is stuck up when it shouldn’t be‚ gently push it down with a wooden spoon (ensure the pot is unplugged!)․ Sometimes‚ debris or condensation around the seal prevents proper movement; a thorough cleaning can resolve this․
Conversely‚ if the valve remains down when pressure should be building‚ it indicates insufficient pressure․ Check the sealing ring for cracks or damage‚ and ensure the lid is correctly locked․ Food particles can also obstruct the valve‚ so inspect and clean it carefully․
Remember‚ the float valve’s position dictates whether the lid can be opened․ Never force the lid open if the valve is up! If issues persist‚ consult the Instant Pot website for detailed troubleshooting steps and potential replacement options․ A properly functioning float valve is vital for safe and effective operation․
Understanding Error Codes on the Instant Pot Display
The Instant Pot display utilizes error codes to communicate issues‚ preventing potential hazards and ensuring safe operation․ Common codes include “Burn‚” indicating food is sticking to the bottom – usually requiring liquid addition and scraping․ “H2O” signals a potential moisture sensing problem‚ often resolved by checking the sealing ring and ensuring proper lid placement․
“Lid” indicates the lid isn’t sealed correctly or isn’t locked into place․ Double-check the lid’s alignment and locking mechanism․ Other codes‚ like “OL‚” suggest overheating‚ prompting a cool-down period․ Refer to your Instant Pot’s manual for a comprehensive list of error codes and their specific solutions․
Ignoring error codes can lead to damaged food or even appliance malfunction․ The Instant Pot website and FAQs offer detailed explanations and troubleshooting guides for each code‚ empowering you to resolve issues quickly and safely․ Understanding these signals is key to maximizing your Instant Pot experience․
Energy Efficiency of the Duo Crisp Ultimate Lid
The Instant Pot Duo Crisp Ultimate Lid excels in energy efficiency‚ consolidating multiple appliances into one streamlined unit․ By combining pressure cooking‚ slow cooking‚ air frying‚ and steaming capabilities‚ it reduces the need for separate energy-consuming devices‚ lowering your overall electricity usage․
Pressure cooking significantly cuts cooking times compared to traditional methods‚ translating to less energy expenditure․ The sealed environment traps heat‚ minimizing energy loss․ Similarly‚ air frying utilizes rapid air circulation‚ requiring less energy than a conventional oven․ The Ultimate Lid’s design optimizes heat distribution‚ further enhancing efficiency․
Compared to using a stovetop‚ oven‚ and separate air fryer‚ the Duo Crisp Ultimate Lid offers substantial energy savings․ It’s an environmentally conscious choice‚ helping you reduce your carbon footprint while enjoying convenient and delicious meals․ Investing in this appliance is a step towards a more sustainable kitchen․
Comparing the Ultimate Lid to Previous Instant Pot Lids
The Instant Pot Duo Crisp Ultimate Lid represents a significant advancement over previous Instant Pot lid designs․ Earlier models typically required separate lids for pressure cooking and air frying‚ creating storage challenges and potential inconvenience․ The Ultimate Lid consolidates these functions into a single‚ versatile unit․
Previous lids often necessitated switching between components mid-recipe‚ disrupting the cooking process․ The Ultimate Lid eliminates this step‚ offering seamless transitions between cooking methods․ Its enhanced design also improves sealing efficiency‚ leading to faster pressure build-up and more consistent results․
Furthermore‚ the Ultimate Lid boasts improved safety features and a more intuitive locking mechanism․ It’s a more user-friendly and space-saving solution for Instant Pot owners․ While older lids remain functional‚ the Ultimate Lid provides a superior cooking experience‚ offering greater convenience and versatility for a modern kitchen․
Resources and Support: Instant Pot Website and FAQs
For comprehensive support and to maximize your Instant Pot Duo Crisp Ultimate Lid experience‚ the official Instant Pot website is your primary resource․ It hosts a wealth of information‚ including detailed user manuals‚ recipe collections‚ and troubleshooting guides․ You can access it at www․instantpot․com․
The website’s FAQ section addresses common questions regarding lid operation‚ error codes‚ cleaning procedures‚ and more․ It’s a valuable starting point for resolving minor issues independently․ Instant Pot also provides a dedicated customer support team reachable through their website‚ offering assistance via email or live chat;
Additionally‚ numerous online communities and forums are dedicated to Instant Pot cooking․ These platforms allow users to share tips‚ recipes‚ and solutions to common problems․ Exploring these resources can provide valuable insights and help you unlock the full potential of your Duo Crisp Ultimate Lid․ Don’t hesitate to leverage these support channels!