The Crosman 760 Pumpmaster is a classic pneumatic air rifle designed for shooting BBs and .177 caliber pellets, ideal for target shooting and small game hunting.
History and Overview of the Crosman 760 Pumpmaster
The Crosman 760 Pumpmaster, introduced in 1966, is a renowned pneumatic air rifle by Crosman, a trusted brand since 1923. Known for its reliability and versatility, it shoots both BBs and .177 pellets, making it a favorite for target shooting and small game hunting. Its durable design, featuring a synthetic stock, ensures long-lasting performance. Easy to use and maintain, the Pumpmaster remains popular among shooters of all skill levels, solidifying its place as a classic in airgun history.
Key Features and Specifications
The Crosman 760 Pumpmaster is a pneumatic air rifle chambered for .177 caliber pellets and 4.5mm BBs, offering versatility for target shooting and small game hunting. It features an 18-round BB magazine and a 5-round pellet clip. The rifle measures 36.5 inches in length and weighs 4.5 pounds, making it lightweight and easy to handle. Its durable synthetic stock ensures longevity, while the bolt-action design provides smooth operation. The air rifle achieves muzzle velocities up to 600 FPS with BBs and 700 FPS with pellets, delivering consistent performance. A cross-bolt safety ensures secure operation.

Safety Guidelines and Warnings
Always wear shooting glasses to protect your eyes. Use only Crosman-approved pellets and BBs. Ensure adult supervision for users under 16. Treat the airgun as a firearm.
Important Safety Precautions Before Use
Always wear shooting glasses to protect your eyes. Ensure adult supervision for users under 16. Treat the airgun as a firearm and never aim it at people or animals. Keep fingers away from the trigger until ready to shoot. Use only Crosman-approved pellets and BBs to avoid damage. Store the airgun unloaded and in a secure location. Follow all local laws and regulations regarding airgun use. Read the entire manual before firing to ensure safe operation.

Age Recommendations and Supervision
The Crosman 760 Pumpmaster is recommended for users aged 16 and above, as it is not a toy and requires responsible handling. Adult supervision is mandatory for younger users to ensure safe operation. Parents or guardians should oversee loading, firing, and maintenance to prevent accidents. Proper training and adherence to safety guidelines are essential for all users, regardless of age, to handle the airgun effectively and responsibly.
Parts and Accessories
The Crosman 760 Pumpmaster includes essential components like the barrel, pump assembly, and stock. Additional accessories such as scopes, pellets, and BBs are available for enhanced performance.
Exploded Parts Diagram and Components
The Crosman 760 Pumpmaster’s exploded parts diagram reveals its core components, including the barrel, receiver, pump tube, and stock. Detailed schematics are available in the owner’s manual, showing how each part interacts. The diagram helps users identify components like the trigger assembly, pellet probe, and BB reservoir. Understanding these parts is crucial for maintenance and troubleshooting. The manual also provides part numbers for easy reference when ordering replacements or upgrades.
Compatible Pellets and BBs for Optimal Performance
The Crosman 760 Pumpmaster is designed to shoot .177 caliber pellets and 4.5mm BBs. For best accuracy, use high-quality pellets like Crosman’s domed or hollow-point options. BBs should be steel and spherical for consistent performance. Avoid using non-specified ammunition to ensure proper function and prevent damage. Always follow the manual’s recommendations for optimal results and to maintain the air rifle’s longevity.
Assembly and Initial Setup
Unbox and inspect the Crosman 760, ensuring all parts are included. Attach the scope and accessories according to the manual for safe and proper setup.
Unboxing and Initial Inspection
Upon unboxing the Crosman 760 Pumpmaster, carefully inspect the air rifle for any visible damage or defects. Ensure all components, including the barrel, stock, and pump handle, are intact. Check for the presence of accessories like pellets, BBs, or a scope, as specified in your purchase. Refer to the owner’s manual for a detailed list of included parts. Perform this inspection before assembly to guarantee optimal performance and safety.
Attaching the Scope and Other Accessories
To attach the scope, remove the rear sight and align the scope rings with the barrel. Secure the scope firmly using the provided rings, ensuring it is level and properly aligned. Tighten the rings gently to avoid damaging the scope. Once mounted, check the sight-in process to ensure accuracy. For other accessories, refer to the owner’s manual for specific installation instructions to maintain optimal performance and safety.

Loading and Firing the Crosman 760
The Crosman 760 uses BBs and .177 pellets. Load BBs into the reservoir and pellets directly into the chamber. Pump the rifle 3-8 times for optimal power, ensuring safe handling and accurate shooting.
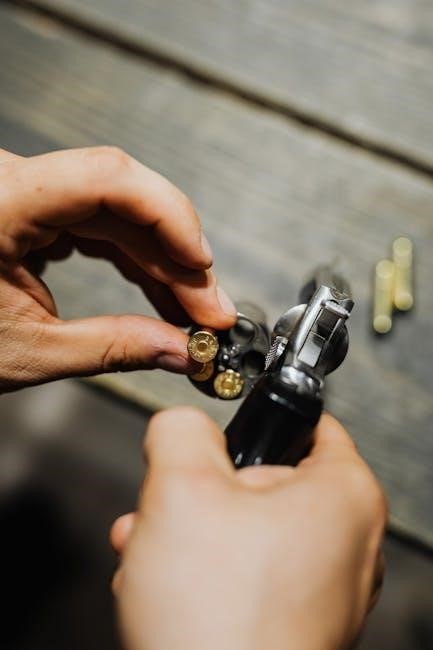
Step-by-Step Loading Instructions for BBs
To load BBs in the Crosman 760 Pumpmaster, first fill the BB reservoir by pouring BBs into the loading port. Ensure the muzzle is pointed downward to prevent BBs from falling out. Gently shake the rifle to settle the BBs. Cock the bolt to access the chamber, then load a single BB. Repeat for each shot, making sure not to overfill the reservoir. Always wear eye protection and follow safety guidelines for safe operation.
Proper Technique for Firing the Air Rifle
Hold the Crosman 760 Pumpmaster firmly with both hands, ensuring a stable grip. Aim carefully at your target, keeping the rifle steady. Take a deep breath, exhale slowly, and squeeze the trigger gently to avoid jerking the barrel. Always wear shooting glasses for eye protection. Maintain control of the muzzle direction, even after firing. Practice proper shooting posture to ensure accuracy and safety. Follow all safety guidelines outlined in the manual for optimal performance and responsible use.
Maintenance and Upkeep
Regular cleaning of the barrel and internal components ensures optimal performance. Use recommended cleaning products and dry thoroughly after cleaning. Store the rifle in a dry place, inspecting for wear and tear; Follow the owner’s manual for detailed maintenance guidelines to extend the life and reliability of your Crosman 760 Pumpmaster.
Cleaning the Barrel and Internal Components
Regularly clean the barrel and internal parts to maintain accuracy and prevent rust. Use a soft cloth or brush to remove dirt and debris. Apply a mild cleaning solution, rinse thoroughly, and dry with a clean cloth. Lubricate moving parts with silicone-based oil to prevent rust. After cleaning, ensure all components are dry and free from moisture. Store the air rifle in a dry place to prevent corrosion. Always refer to the owner’s manual for specific cleaning recommendations.
Storing the Air Rifle Properly
Store the Crosman 760 Pumpmaster in a dry, cool place away from direct sunlight and moisture. Keep the air rifle unloaded and in a protective case or soft cloth to prevent scratches. Avoid extreme temperatures and humidity. Regularly inspect the rifle for signs of wear or rust. Store the air rifle out of reach of children and ensure the muzzle is uncovered to prevent dust buildup. For long-term storage, apply a light coat of silicone-based oil to metal parts to prevent corrosion. Always follow the owner’s manual for specific storage recommendations;

Troubleshooting Common Issues
Identify and address leaks, jams, or low power by consulting the owner’s manual. Check for proper assembly, pellet/BB alignment, and valve function. Contact Crosman support for assistance.

Diagnosing and Fixing Leaks or Low Power
Leaks often occur due to worn seals or improper connections. Inspect the pump, valve, and barrel for gaps or damage. Low power may result from insufficient pumping or a faulty valve stem. Consult the owner’s manual for diagrams and repair guidance. Tighten all connections and replace seals if necessary. Ensure proper pellet loading and alignment to maintain optimal performance. If issues persist, contact Crosman customer support for professional assistance or replacement parts.

Resolving Jamming Issues
Jams typically occur due to incorrect loading or using damaged pellets. Ensure the magazine is empty and inspect the chamber for obstructions. Use a cleaning rod to clear debris from the barrel. Always load pellets correctly, with the skirt facing outward. Avoid using dirty or deformed ammunition. Regularly clean the barrel and internal components to prevent residue buildup. Refer to the owner’s manual for detailed instructions or contact Crosman support for assistance.

Accessories and Upgrades
Enhance your Crosman 760 with scopes, mounts, and high-capacity magazines. Upgrade kits for improved performance are available. Visit Crosman’s official website for genuine parts and accessories.
Recommended Upgrades for Enhanced Performance
To enhance your Crosman 760 Pumpmaster’s performance, consider upgrading to a high-quality scope with adjustable magnification for improved accuracy. Install a Picatinny rail mount for easy accessory attachment. Upgrade the trigger system for smoother action and reduced creep. Additionally, high-capacity magazines and tuning kits can boost power and reliability. Always ensure upgrades are compatible and installed correctly to maintain optimal function. Visit Crosman’s official store for genuine parts and accessories.
Where to Purchase Genuine Crosman Parts
Genuine Crosman parts for the 760 Pumpmaster are available directly from Crosman’s official website (www.crosman.com). Additionally, authorized retailers like Pyramyd Air and Airgun Depot stock a wide range of compatible components. For convenience, the Crosman Parts Diagram (760L-515.pdf) and Exploded View (760B and 760P EVP) can help identify specific parts needed. Always verify compatibility before making a purchase to ensure proper fitment and functionality.

Warranty and Customer Support
Crosman offers a limited warranty for the 760 Pumpmaster, covering defects in materials and workmanship. For inquiries or support, contact Crosman at 1-800-724-7486 or visit www.crosman.com.

Understanding the Crosman Warranty Policy
The Crosman 760 Pumpmaster is backed by a limited warranty covering defects in materials and workmanship. The warranty period varies by component, with most parts covered for one year from purchase. For warranty claims or repairs, contact Crosman’s customer service at 1-800-724-7486 or visit their official website. Proper registration and maintenance are recommended to ensure warranty validity. Always refer to the official owner’s manual for detailed warranty terms and conditions.
Contacting Crosman Customer Service
For inquiries, troubleshooting, or warranty support, contact Crosman Customer Service at 1-800-724-7486 or 585-657-6161. Visit their website at www.crosman.com for online assistance, manuals, and parts diagrams. Ensure to have your model number, such as the 760 Pumpmaster, ready when reaching out for efficient support. Crosman’s dedicated team is available to address questions and provide solutions for optimal performance and maintenance of your air rifle.
The Crosman 760 Pumpmaster remains a reliable and durable choice for air rifle enthusiasts, offering ease of use and versatility for both beginners and experienced shooters.
The Crosman 760 Pumpmaster manual emphasizes safety, proper assembly, and maintenance. It guides users through loading BBs and pellets, troubleshooting common issues, and storing the air rifle; The manual also highlights the importance of following safety precautions and age recommendations. By adhering to the instructions, users can ensure optimal performance and longevity of the air rifle. Regular maintenance, such as cleaning the barrel, is stressed to maintain accuracy and functionality. Always refer to the manual for detailed procedures and warranty information.
Encouragement for Safe and Enjoyable Use
Congratulations on choosing the Crosman 760 Pumpmaster! This air rifle offers reliable performance and accuracy for target shooting and small game hunting. Always follow safety guidelines, wear eye protection, and ensure adult supervision for younger users. Proper handling and maintenance will ensure years of enjoyable use. Remember to store the air rifle securely and out of reach of children. Enjoy your shooting experiences responsibly and safely!
Additional Resources
For more information, visit the official Crosman website or download the PDF manual (760KBA515). Explore online forums and communities for tips and support from experienced users and enthusiasts.
Downloading the Official Owner’s Manual
The official Crosman 760 Pumpmaster owner’s manual is available for download as a PDF from Crosman’s website. Visit www.crosman.com and navigate to the support section. Search for the model number or product name to access the manual. The manual provides detailed instructions for safe operation, maintenance, and troubleshooting. Ensure you download the correct version for your specific model year. If you encounter issues, contact Crosman customer support at 1-800-724-7486 for assistance.
Online Communities and Forums for Support
For additional support, visit online forums such as Crosman’s official community, Reddit’s r/Airguns, and specialty airgun forums. These platforms offer troubleshooting tips, maintenance advice, and discussions with experienced users. They are invaluable resources for optimizing your air rifle’s performance and resolving any issues you may encounter. Many enthusiasts share their knowledge, ensuring you get the most out of your Crosman 760 Pumpmaster.