Smeg coffee machines blend iconic retro design with cutting-edge technology, offering a range of models to suit every coffee lover’s needs, ensuring exceptional brewing experiences.
1.1 Overview of Smeg Coffee Machine Models
Smeg offers a diverse range of coffee machines, each designed to cater to different preferences and needs. The BCC02 is a countertop espresso machine with a 1.4-liter water tank, ideal for frequent use. The DCF02 drip coffee machine provides a classic brewing experience, while the ECF01 combines retro style with manual espresso capabilities. The BCC12 and BCC13 models are advanced bean-to-cup machines, offering sleek designs and user-friendly controls. Additionally, the EGF03RDUK features a built-in grinder for freshly ground coffee. Smeg also offers fully automatic and semi-automatic options, ensuring a model for every coffee enthusiast, whether they prefer simplicity or advanced customization.
1.2 Key Features of Smeg Coffee Machines
Smeg coffee machines are renowned for their premium materials, stylish designs, and innovative features. They boast powerful brewing systems with precise temperature control, ensuring optimal flavor extraction. Many models include large water tanks, like the 1.4-liter capacity in the BCC02, for convenience. Advanced models offer bean-to-cup technology, built-in grinders, and customizable settings for coffee strength and grind size. Some machines, such as the EGF03RDUK, feature manual espresso functionality, appealing to enthusiasts. The combination of retro aesthetics with modern smart features, like connectivity options, makes Smeg machines both functional and visually appealing. Each model is designed for durability and ease of use, providing a seamless coffee-making experience tailored to individual preferences.
1.3 Importance of Reading the Instruction Manual
Reading the instruction manual for your Smeg coffee machine is essential for safe and optimal use. It provides detailed guidelines for installation, operation, and maintenance, ensuring you get the most out of your machine. The manual highlights safety precautions, such as proper electrical connections and avoiding overheating, to prevent accidents. It also explains how to use advanced features, like temperature control and grind settings, to customize your coffee experience. Additionally, the manual includes troubleshooting tips for common issues and maintenance routines, like descaling and cleaning, to maintain performance and extend the machine’s lifespan. By following the manual, you can ensure longevity, safety, and consistent results from your Smeg coffee machine.

Safety Precautions
Always follow safety guidelines in the manual to prevent accidents. Ensure proper electrical connections, avoid overheating, and keep the machine out of children’s reach for safe operation.
2.1 General Safety Guidelines
To ensure safe operation of your Smeg coffee machine, always read the manual carefully before use. Follow all safety guidelines to prevent accidents and maintain the machine’s efficiency. Avoid overheating by ensuring proper ventilation around the machine. Keep the appliance out of reach of children and pets to prevent unintended operation. Never leave the coffee machine unattended while it is in use. Avoid using damaged power cords or plugs, as this can lead to electrical hazards. Regularly inspect the machine for signs of wear or damage, and address any issues promptly. Failure to follow these guidelines may result in malfunction, injury, or void the warranty. Proper adherence ensures a safe and enjoyable coffee-making experience.
2.2 Electrical Safety Tips
Ensure your Smeg coffee machine is plugged into a grounded electrical outlet rated for its power requirements. Avoid using extension cords or overloaded circuits, as this can cause electrical hazards. Regularly inspect the power cord for signs of damage or wear; if damaged, replace it immediately to prevent risks of electric shock. Always switch off the machine and unplug it before cleaning or performing maintenance. Never submerge electrical components in water or expose them to excessive moisture. Keep the machine on a stable, heat-resistant surface away from flammable materials. For any repairs, contact an authorized Smeg service center to maintain safety and warranty validity. Proper electrical safety practices protect both the user and the machine, ensuring long-term reliability and performance.
2.3 Precautions for Children
Keep children away from the Smeg coffee machine, as hot surfaces, sharp edges, and moving parts can pose serious risks. Never allow children to operate the machine or touch its components without adult supervision. Ensure children do not play with the machine or its accessories, such as filters or the power cord. Always supervise minors in the kitchen when the machine is in use. Teach children to avoid touching the machine’s hot surfaces, such as the brew head or steam wand, as they can cause burns. Store coffee beans and accessories out of reach to prevent accidental ingestion or misuse. Regularly inspect the machine for any damage that could pose a hazard to children. By taking these precautions, you can ensure a safer environment for both children and your Smeg coffee machine.
Installation and Setup
Proper installation ensures optimal performance. Unpack carefully, place on a stable surface, and connect to power and water supply as instructed. Follow initial setup and calibration steps.
3.1 Unpacking and Placement
Unpack your Smeg coffee machine carefully, ensuring all components are included and undamaged. Place it on a stable, flat surface, away from direct sunlight and heat sources. Allow sufficient space around the machine for easy access and ventilation. Ensure the surface is clean and dry to prevent any damage or electrical issues. Proper placement is crucial for optimal performance and safety. Follow the manual’s guidelines for positioning to avoid any operational difficulties. Once placed correctly, proceed to the next steps of installation.
3.2 Connecting to Power and Water Supply
Connect your Smeg coffee machine to a grounded electrical outlet, ensuring the voltage matches the machine’s specifications. Use the provided power cord to avoid damage or electrical hazards. For models with a water tank, fill it with fresh, filtered water to prevent scaling. Some Smeg machines may require direct water connection; refer to your model’s manual for specific instructions. Avoid using hard water to maintain optimal performance. If your machine has a built-in water filter, ensure it is correctly installed. After connecting, test the machine by running a water cycle without coffee grounds. Regularly descale the machine to remove mineral buildup, using a Smeg-recommended descaler. Proper water and power connections are essential for safe and efficient operation.
3.3 Initial Setup and Calibration
After unpacking and placing your Smeg coffee machine, begin by plugging it into a grounded power outlet. Ensure the machine is on a stable, heat-resistant surface. For models with a built-in grinder, calibrate the grind settings according to your preference. Adjust the coarseness or fineness to suit your coffee beans. If your machine has a water filter, install it as per the manual. Perform the initial rinse cycle by running water through the machine without coffee grounds. Some models may require setting the clock or selecting default brewing parameters. Refer to the manual for specific calibration steps, as they may vary by model. Once set up, run a test brew to ensure proper function. Regular calibration ensures optimal performance and flavor consistency. Always follow the manufacturer’s guidelines for initial setup to avoid any issues. Proper calibration is key to enjoying your Smeg coffee machine’s full potential.
Operating the Coffee Machine
Press the power button to turn on the machine. Use the control panel to select brewing options and customize settings. Monitor the process and ensure water levels are adequate. Regularly check and refill beans or grounds as needed for continuous operation.
4.1 Turning On and Off
To turn on your Smeg coffee machine, press the power button located on the control panel. The machine will begin its startup sequence, which includes heating up and preparing for brewing. Ensure the water tank is filled and the machine is properly plugged into a power source. Once the machine is on, you can select your desired coffee mode. To turn it off, press and hold the power button until the machine powers down completely. Always unplug the machine after use for safety. Follow these steps to ensure efficient operation and maintain the longevity of your Smeg coffee machine; Refer to the manual for model-specific instructions.
4.2 Selecting Coffee Modes (Espresso, Cappuccino, etc.)
Selecting your preferred coffee mode on a Smeg coffee machine is straightforward. Use the control panel to choose from options like Espresso, Cappuccino, or Latte. For Espresso, press the dedicated button, and the machine will dispense a single or double shot based on your selection. For Cappuccino or Latte, the machine will automatically froth milk and combine it with espresso. Some models allow customization of coffee strength, milk froth levels, and temperature. Ensure the milk container is properly attached if using milk-based modes. Refer to your specific model’s manual for detailed instructions on mode selection and customization options. Experiment with settings to find your perfect cup. Always follow the manual’s guidance for optimal results.
4.3 Adjusting Settings (Temperature, Grind, etc.)
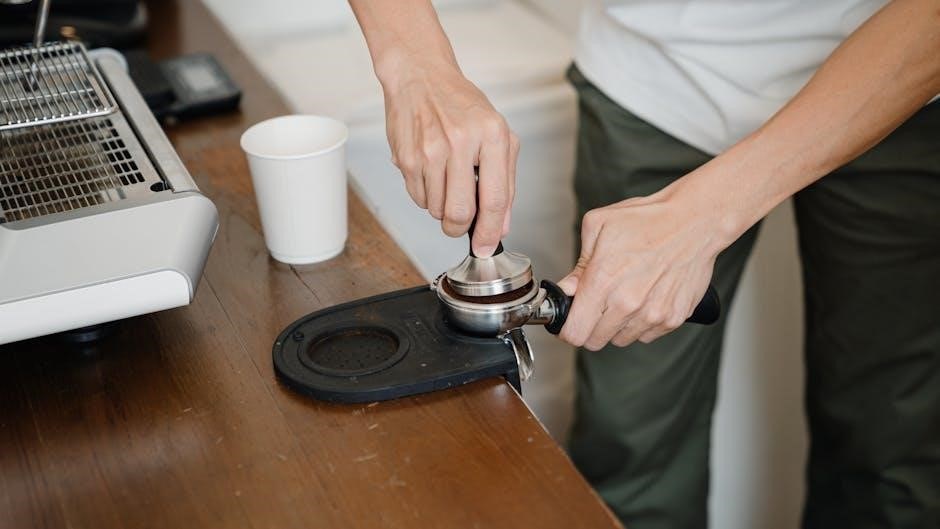
Adjusting settings on your Smeg coffee machine ensures a personalized brewing experience. Temperature control allows you to set the ideal heat for your coffee, typically between 195°F and 205°F. Grind size can be adjusted using the built-in grinder, with options for fine or coarse settings depending on your brewing method. Some models offer pre-set options for Espresso, Drip, or French Press. Milk froth temperature and texture can also be customized for cappuccinos and lattes. Use the control panel to navigate through settings, and refer to the manual for specific instructions. Regularly cleaning and calibrating the grinder ensures optimal performance. Experiment with these adjustments to tailor your coffee to your taste preferences. Proper calibration and maintenance are key to consistent results.
Maintenance and Cleaning
Regular maintenance ensures optimal performance and longevity of your Smeg coffee machine. Clean the brew group and drip tray daily, descale periodically, and perform deep cleaning as recommended.
5.1 Daily Cleaning Routine
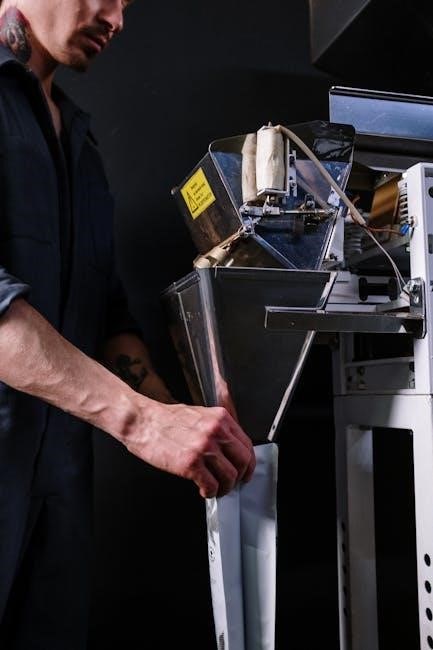
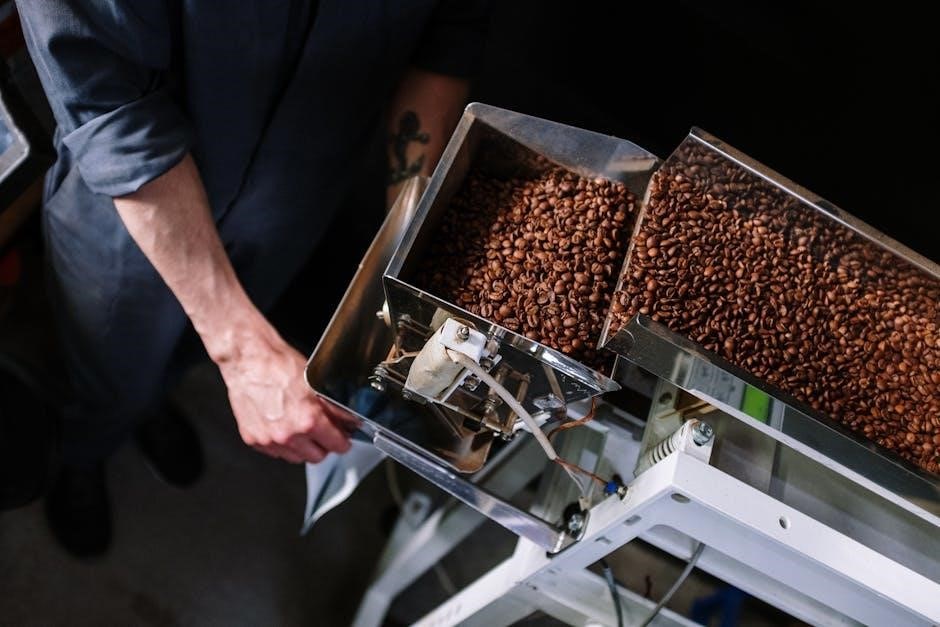
Establishing a daily cleaning routine is essential for maintaining your Smeg coffee machine’s performance and hygiene. Start by turning off and unplugging the machine for safety. Wipe down the exterior with a damp cloth to remove any splatters or fingerprints, paying attention to buttons and high-touch areas. Clean the brew group and drip tray by rinsing them under warm water and drying thoroughly. Empty the used coffee grounds container and rinse it if necessary. For models with milk frothing capabilities, clean the steam wand after each use by purging it with steam. Regularly check and refill the water tank to ensure freshness. These simple steps help prevent mineral buildup and bacterial growth, ensuring your machine continues to deliver perfect brews.
5.2 Descaling the Machine
Descaling your Smeg coffee machine is crucial to remove mineral deposits that can affect performance and flavor. Use a descaler recommended by Smeg to avoid damage. Start by turning off and unplugging the machine. Follow the descaler instructions for the correct dosage and application. Pour the solution into the water tank and run it through the machine without coffee grounds. Repeat the cycle until the tank is empty. Rinse thoroughly by running fresh water through the machine multiple times to remove any residual descaler taste. Regular descaling ensures optimal water flow and prevents scaling buildup, maintaining your machine’s efficiency and longevity. Smeg recommends descaling every 2-3 months, depending on usage and water hardness.
5.3 Deep Cleaning and Sanitizing
Deep cleaning and sanitizing your Smeg coffee machine are essential for maintaining hygiene and performance. Start by mixing equal parts water and white vinegar in the water tank. Run the solution through the machine, ensuring it flows through all parts, including the brew group and spout. Repeat the process until the tank is empty. Rinse thoroughly by running fresh water through the machine multiple times to eliminate any vinegar taste. For tougher buildup, Smeg recommends using a descaler or cleaning solution specifically designed for coffee machines. Sanitize by wiping all exterior surfaces with a damp cloth and drying thoroughly. Regular deep cleaning prevents mineral buildup and bacteria growth, ensuring your machine continues to deliver perfect results. Smeg advises deep cleaning every 1-2 months for optimal maintenance.
Troubleshooting Common Issues
Common issues with Smeg coffee machines include power malfunctions, brewing inconsistencies, and error codes. Refer to the manual for detailed solutions and maintenance tips to resolve problems effectively.
6.1 Machine Not Turning On
If your Smeg coffee machine does not turn on, first ensure it is properly plugged into a functioning power outlet. Check the power cord for damage and verify the outlet works with another appliance. If using a surge protector or extension cord, bypass it to rule out interference. Some models have a dedicated power switch; ensure it is in the “on” position. If the issue persists, check your circuit breaker or fuse box to ensure no breakers have tripped or fuses blown. Consult the user manual for specific troubleshooting steps, as some models may have unique power requirements. If none of these solutions work, contact Smeg customer support for further assistance or to schedule a repair.
6.2 Coffee Not Brewing Properly
If your Smeg coffee machine is not brewing coffee properly, check for issues such as insufficient water in the tank or incorrect coffee grounds. Ensure the water filter is clean and properly installed. Scale buildup can also disrupt brewing; descale the machine if necessary. Verify that the coffee settings, such as grind size and tamping, are correct for your machine. If using pods, ensure they are compatible and properly seated. Consult the user manual for specific troubleshooting steps, as some models may have unique calibration requirements. If the issue persists, reset the machine to factory settings or contact Smeg customer support for professional assistance. Regular maintenance and proper setup are key to resolving brewing issues effectively.
6.3 Error Codes and Solutions
Smeg coffee machines may display error codes to indicate specific issues. Common codes include E1 (water tank empty or not detected), E2 (scale buildup or descaling needed), and E3 (heating element malfunction). To resolve these, check the water tank, descale the machine, or reset it by turning it off and on. For error E4 (grinder blockage), clean the grinder and ensure proper bean flow. If E5 (milk system issue) appears, check for blockages in the milk frother or tubing. Refer to your user manual for model-specific codes and solutions. If problems persist, contact Smeg customer support for professional assistance. Regular maintenance, like descaling and cleaning, can help prevent these errors and ensure optimal performance.

Accessories and Additional Features
Smeg coffee machines offer various accessories like filters, grinders, and milk frothers to enhance functionality. Additional features include smart connectivity, allowing remote operation via apps for convenience;
7.1 Compatible Accessories (Filters, Grinder, etc.)
Smeg coffee machines are compatible with a variety of accessories to enhance your brewing experience. Filters, such as the Smeg Softener Filter, ensure optimal water quality and preserve coffee aroma. A built-in or separate grinder allows for freshly grinding beans, with burr grinders offering precise control over grind size. Additional accessories like milk frothers enable the creation of creamy cappuccinos and lattes. These components are designed to integrate seamlessly with Smeg machines, ensuring compatibility and ease of use. By utilizing these accessories, users can customize their coffee-making process to suit their preferences, ultimately achieving a superior coffee experience tailored to their taste.
7.2 Optional Attachments (Milk Frother, etc.)
Smeg coffee machines offer optional attachments to enhance your coffee experience. The milk frother is a popular addition, allowing you to create creamy cappuccinos and lattes with ease. Designed for convenience, these attachments integrate seamlessly with Smeg machines, ensuring optimal performance and aesthetics. The frother’s compact design and easy-clean features make it a practical choice for daily use. Additional attachments may include steam wands or specialized brewing tools, further expanding the machine’s capabilities. These optional extras enable users to customize their coffee-making process, catering to a variety of preferences and coffee styles. By adding these attachments, Smeg coffee machines become even more versatile, offering a complete solution for coffee enthusiasts who value both quality and flexibility.
7.3 Smart Features and Connectivity

Smeg coffee machines are equipped with advanced smart features and connectivity options, enhancing user convenience and personalization. Many models offer Wi-Fi or Bluetooth connectivity, allowing users to control their machine via smartphone apps. These apps enable scheduling, customizing brewing settings, and receiving maintenance alerts. With smart features, users can preset their favorite coffee settings, ensuring a perfect brew every time. The integration of voice assistants like Alexa further adds to the machine’s functionality, allowing hands-free operation. Such innovations make Smeg coffee machines a blend of traditional style and modern technology, catering to tech-savvy users who appreciate seamless integration with their smart home systems. These features not only simplify the coffee-making process but also elevate the overall user experience, making Smeg machines a standout choice in the market.

Warranty and Customer Support
Smeg offers a comprehensive warranty and dedicated customer support, providing assistance for any issues. Users can contact Smeg through their website or visit authorized service centers for maintenance.
8.1 Warranty Terms and Conditions
Smeg offers a comprehensive warranty program for its coffee machines, ensuring coverage for parts and labor under normal use. The standard warranty typically lasts for one year from the purchase date, but this may vary depending on the model and region. To benefit from the warranty, users must register their product and retain the proof of purchase. The warranty covers defects in materials and workmanship but excludes damages caused by misuse or improper maintenance. For specific details, including terms and conditions, users should refer to the official Smeg website or the provided instruction manual. Extended warranties may also be available for purchase. Always ensure to use Smeg-approved parts and services to maintain warranty validity.
8.2 Contacting Smeg Customer Service
Smeg provides dedicated customer service to assist with inquiries, troubleshooting, and support for coffee machines. Users can contact Smeg through their official website, where regional contact details, including phone numbers and email addresses, are available. Additionally, Smeg customer service can be reached via the provided contact form on their website. For efficient assistance, it is recommended to have the product code, model number, and proof of purchase ready. Smeg also offers support through authorized service centers, ensuring prompt resolution for any issues. Customers can expect professional guidance on maintenance, repairs, and warranty-related matters. For the most accurate and up-to-date information, always refer to the official Smeg website or the instruction manual.
8.3 Finding Authorized Service Centers
To locate an authorized Smeg service center, visit the official Smeg website and navigate to the “Support” or “Service” section. Enter your product code or model number to find the nearest authorized center. Smeg’s website also provides a service center locator tool, allowing users to search by region or country. For additional assistance, contact Smeg’s customer service team via phone or email, using the details provided in the instruction manual. Authorized service centers ensure genuine parts, proper repairs, and warranty compliance, maintaining your coffee machine’s performance and longevity. Always verify the center’s authorization to avoid unauthorized repairs that may void your warranty. This ensures reliable and high-quality service tailored to your Smeg coffee machine.
Smeg coffee machines perfectly blend style and functionality, offering ease of use and durability. With a comprehensive manual, they ensure a timeless and enjoyable coffee experience.
9.1 Summary of Key Points
Smeg coffee machines combine retro aesthetics with modern functionality, offering ease of use and durability. Their comprehensive manuals guide users through installation, operation, and maintenance. Regular cleaning and descaling ensure optimal performance, while troubleshooting sections help resolve common issues. With models ranging from manual espresso to fully automatic designs, Smeg caters to diverse preferences. The machines’ sleek designs and vibrant colors enhance kitchen decor, making them both functional and stylish. By adhering to the manual’s instructions, users can extend the machine’s lifespan and enjoy consistent, high-quality coffee. Smeg’s commitment to quality and innovation ensures a superior coffee experience tailored to every user’s needs.

9.2 Final Tips for Optimal Use
To maximize your Smeg coffee machine’s performance, experiment with various coffee beans and settings to find your perfect brew. Regularly clean and descale the machine to prevent mineral buildup and maintain flavor. Use filtered water for optimal taste and longevity of the machine. Always refer to the manual for model-specific care instructions. Store the machine in a dry place when not in use and avoid extreme temperatures. Explore advanced features like customizable settings to enhance your coffee experience. For warranty support, register your machine and keep the manual handy for quick reference; By following these tips, you’ll enjoy a superior coffee experience and extend the life of your Smeg coffee machine.